Wednesday, September 30, 2009
Tuesday, September 29, 2009
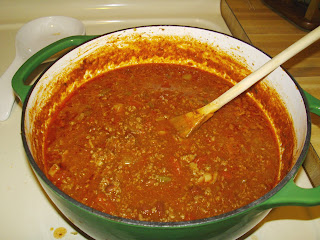
Chili con Bacon?
First you take small pieces of bacon and brown them in the bottom of the pan.


Monday, September 28, 2009
Creme Brule?
Yes, that is a torch, a cooking torch actually. Fire? You're playing with fire? There has been some concern expressed over my owning such a device, but I promise that I am very careful, and well, every good chef must have one. Besides that, this set was originally 20 dollars marked down to not 15, not 10, but 5 dollars! What a bargain. Ok, one of the dishes was missing, and a second was chipped, but it was still a great deal. After some bargaining with my husband, the purchase was made.
People have also asked what you do with said torch. Well, you can caramelize sugar on top of something, or melt cheese on top of soups. Another option is crisping the tops of casseroles.
Thursday, September 24, 2009
Missing Maya
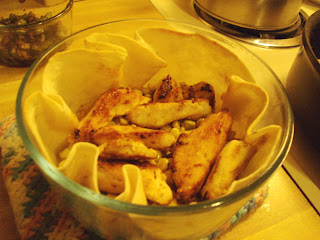
Seeing as how Maya is now about a 7.5 hour drive away, I have to supplement my desire for chicken nachos with something else, so I decided to try and make my own.
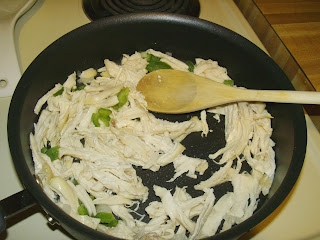
First I put two frozen chicken breasts in the oven to bake. Then, when they were done, but not getting dry yet, I shredded the two pieces of chicken and put them into the skillet. I added chopped onions and green peppers to the mix. The juice that was in the bottom of the pan from the oven was just enough to make it so things didn't stick, and helped to add to the chicken flavor. While the chicken cooked, I added some crushed red peppers. (I have never liked crushed red peppers, because they are spicy and I think they are pointless on pizza. That's the only thing that I had ever seen them used for. Pizza is not supposed to be spicy! Now, I love them, because they add some great flavor as I am cooking things!) Here's how the chicken looked as it was being cooked.

Wednesday, September 23, 2009
What's New
First, did you know that you can easily share one of my recipes with a friend? All you have to do is click on the envelope at the bottom of the post and follow the instructions!
Secondly, you may have noticed to the left of the page a spot where there are a bunch of words. Click on one of those words, like "chicken" and it will take you to all the of the posts that deal with chicken! Isn't that cool?
In an effort to get the word out about this blog, I've added a few places around the internet for people to hear more about The Happily Ever After. One of those places is an amazing site called mixingbowl.com It's a great place where people share their recipes. You can find my profile here. I'll be putting up more complete recipes there as time goes by. Another place I have begun to share about my blog is on Facebook! Search for The Happily Ever After and become a fan. It's an easy place for you to write a quick note, to let everyone know about your thoughts about the recipes. This leads me to something else that will be coming soon.
I want to hear from you! I want to know your favorite recipes. Have you tried some of my recipes? What did you think? What would you like to know more about when it comes to cooking or housework? Be watching for new ways to let me know what you think, and ways that I will use your stories on the blog.
Don't forget to check back every week or so for a new poll. You know what? Polls are sometimes hard to think up. Do you have an idea for a poll? If so, let me know!
I really appreciate everyone who checks this out. I love to hear when you try something, or have learned something from this site. Whether you are single, newly married, or married for 50 years or more, I hope you continue to enjoy The Happily Ever After.
Grapes
This year, I was able to get a bunch of grapes from Grandma. They were a little more sour this year than in the past. Knowing that my husband and I would never eat them all, I decided to try and make some jam.
First I took the skin off of the grapes, saving the skins in a bowl, while cooking the seeds out of the rest of the grapes.
The seeds did start coming out of the grapes. When this happened, the hard part was next. I had to drain the seeds out of the grape mush. This took a long time. The grape mush did not want to drain through anything. When the seeds finally came out, I put the mush back into the pan and added the grape skins with enough sugar to make it sweet.
The rest was easy. All I had to do was cook it on low, and stir occasionally. Finally, I had jam!
Tuesday, September 22, 2009
Autumn Promise
In the spirit of the new season, last Saturday I conquered some new culinary feats. Well, conquered might be too strong of a word. One of them is a new dessert!
I was watching Paula Dean on television and she made a delicious looking cheesecake cookie. A cheesecake cookie? I had never heard of such a thing, but she made it look so easy. The next day, I was still thinking about the recipe, and my husband graciously went to the store to grab the needed ingredients. It's so easy, you have to try it!
First, mix 1 cup of flour, 1/4 cup of brown sugar, 1 cup of crushed graham crackers, and 1 stick of melted butter.
This is going to be your crust. Paula made it with pecans instead of graham crackers, but I hate nuts, and I wanted to see if I could make a graham cracker crust.
When it is all mixed together, pour the mixture into a 13x9 inch pan. Press the mixture down into the pan, covering the bottom. Cook the crust at 350 degrees for 12-15 minutes.
While the crust is cooking, mix together two 8 oz packages of cream cheese, 1 cup of sugar, 3 eggs, and 1 teaspoon of vanilla extract. Beat everything together with a hand mixture until everything it is creamy.
Pour the mixture onto the cooked crust, and place it all in the oven for 20 minutes. When it is finished, remove and let cool completely. Add toppings. I left my cheesecake cookies plain, so that I could add different flavors after I cut each piece to serve. We've had it topped with grape jam, blueberry pie filling, and chocolate chips!
Thursday, September 17, 2009
Simply Sauté
The chicken cooks pretty quickly, and will start to brown as it finishes. As soon as the chicken was done, I added a mixture of chopped green peppers and onions into the same pan. I sauteed them until they were a starting to get a little crispy.
Wednesday, September 16, 2009
Secret Cinnamon Rolls
It seems that in every Baptist church there is one lady that makes the best cinnamon rolls. As a young child, I remembered the treat of receiving a batch of rolls from Martha. They were delightful. When we had to move, we weren't disappointed. There was someone in our new church who had the same talent. Pete (yes, a lady, and if I told you her real name, she'd kill me.) made the best cinnamon rolls. Honestly, I'm more of a meat and potatoes girl, but when a batch of those rolls showed up at church, I had to have one.
Unfortunately, I have not now, nor will I probably ever, master the art of making homemade cinnamon rolls, especially now that I've been taught to cheat the system. My husband's grandmother told me the secret, and I'm sharing it with you. Now, they can in no way compare to Martha or Pete's masterpieces, but they sure are easy to make.
Unroll a can of crescents and spread butter over each piece.
Don't you just love easy recipes?
Grandma Gregory's Goulash
Tuesday, September 15, 2009
Fall Favorites...

Fall has always been my favorite time of the year. I love the changing colors of leaves, but also the way that the bean fields turn yellow. The cooler weather is always appreciated. Fall means hayrides and bonfires, smores, and pumpkin carving. One of my favorite parts of fall is the food! I love, love soup, but I can't bring myself to make it except during the fall. I think that fall is the perfect time for those wonderful comfort foods, soups, casseroles, pies, yummy!
So, over the next few weeks and months I'm going to be sharing some of my favorite fall recipes. I hope you enjoy!
Also, let me know what your favorite part of fall is by voting on my poll to the left.
Tuesday, September 8, 2009
Chicken and Noodles
Imagine my frustration when I had to pluck the rest of the feathers off of my chicken. Much grumbling was heard coming from the kitchen, and my lack of patience caused me to to just grab a knife. Instead of plucking each feather, I just skinned the rest of the chicken.
Finally I got my cleaned chicken into the pot of water, and let it start cooking. I had to get those noodles going. I love the simplicity of making egg noodles. I used 4-6 eggs, and then put as much milk into the mixture as I do eggs. If I use 4 eggs, I put 4 egg fulls of milk into the mixture. The only other thing to add is flour. I added enough to make it doughy.
The fun part came next as I rolled out the dough nice and flat. The problem starting rising again, though. See, I do not have counter space. It's just non-existent in my kitchen. My only option was to roll out the dough on my table.

Well, let's just say that it took many more mistakes before I finally got the dough to do what it needed to do. When it was flat, I rolled it up and sliced the noodles up.
 I spread the noodles out to dry, and left them there all night.
After the chicken was finished cooking, I put it in the fridge. On Sunday I put the pot of chicken back on the stove. I added some chicken bouillon cubes, salt, and pepper for more flavor. Then I added the noodles and cooked it until the noodles were limp.
 It smelled delicious. Now, for the faults...(In case you were starting to believe that I was a cooking genius!)
The noodles, were still a little doughy, needing to have dried some more. I rather like my noodles a little doughy, but not everyone does. Also, the whole meal was a little bland. Even though I had put in the bouillon cubes and seasonings, it was still a little plain. Adding some more seasoning would have probably helped. All in all, I think the experiment was ok, although, I will never choose to cook with a whole chicken again.
Wednesday, September 2, 2009
I wish that every day were Saturday...
After fighting with a chicken, suffering from the lack of counter space, and a limited amount of time, I was able to complete the three recipes that had been on the agenda. I'll share more later, but today we are enjoying the homemade chicken potpie.
To enjoy this amazingly delicious recipe,
This recipe makes two potpies, one to cook and one to freeze!
Use the store bought frozen pie crust. There are lots of kinds to buy, but I choose the kind that is already in the pan. The pie crust often comes in twos, but make sure to buy two. One crust will be the bottom, and the other will be the top of the potpie.
While the pie crusts are frozen, take two of the crusts out of the pie pan. When the crusts are thawed, it will be too difficult to try to take it out of the pan. The pie crusts that are out of the pan will be the top of the pie. Let all of the crusts thaw.
Cook a bag of frozen mixed vegetables. While that is cooking chop into chunks and cook, two to three pieces of the boneless, skinless chicken breast. (I cooked mine in the microwave.)
When the vegetables and chicken are cooked, mix together with two cans of cream of chicken soup. Add a bit of sage and mix.

Cook the bottom part of the pie crust until it begins to turn golden brown. Then divide the mixture between the two pans.

Add the second crust to the top, and poke some holes in the top. There will probably be a little extra dough from the top crust, which we used for a fun design.

Place the pie on a cookie sheet, in case it bubbles over, and place in the oven at around 400 degrees. Cook until the top crust is brown and a little crisp. We cooked one pie that night, and then covered and stuck the other one in the freezer for later. It was delicious!

Tuesday, September 1, 2009
Internet Help?
The Finger Test to Check the Doneness of Meat
Method
Open the palm of your hand. Relax the hand. Take the index finger of your other hand and push on the fleshy area between the thumb and the base of the palm. Make sure your hand is relaxed. This is what raw meat feels like. (Check this out the next time you have a raw steak to cook.)
Now gently press the tip of your pinky and your thumb together. Again feel the fleshy area below the thumb. It should feel quite firm. This is what well done meat feels like when you press on it. (Check this out the next time you overcook a piece of meat.)
Press the tip of your ring finger and your thumb together. The flesh beneath the thumb should give a little more. This is what meat cooked to a medium doneness feels like.
Gently press the tip of your middle finger to the tip of your thumb. This is medium rare.
Press the tip of your index finger to the tip of your thumb. The fleshy area below the thumb should give quite a bit. This is what meat cooked to rare feels like. Open up your palm again and compare raw to rare.
Simply Recipes http://simplyrecipes.com


